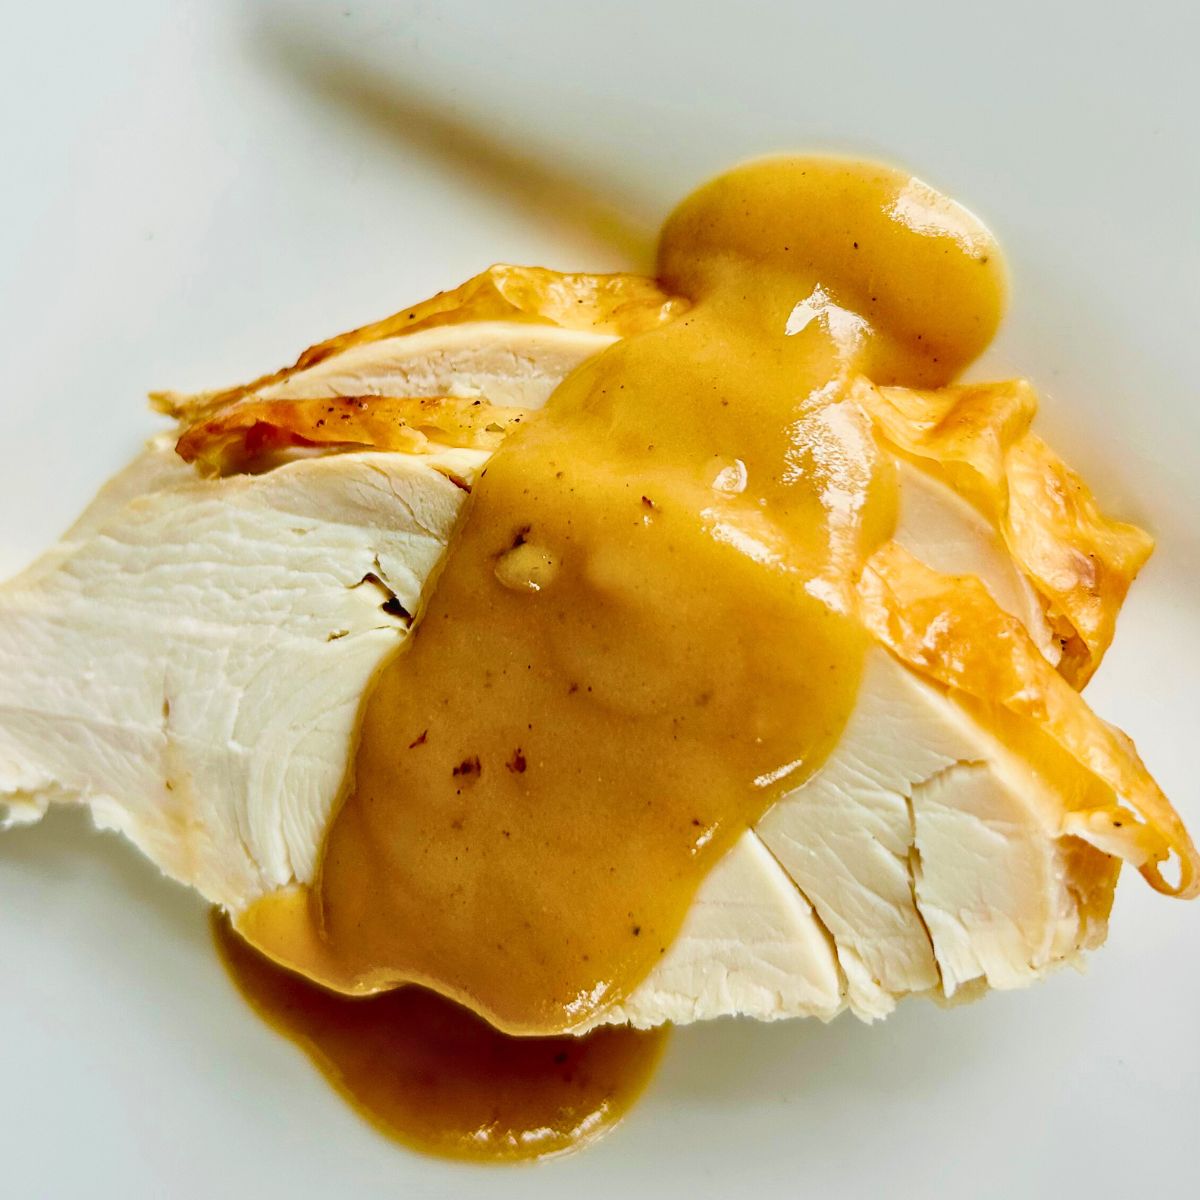
Try my "daughter-approved" easy roasted turkey with pan gravy recipe made in a cast-iron skillet. It's a one-pan solution that goes from oven to stovetop for Thanksgiving turkey and gravy. Simple steps, less clean up, and gorgeous gravy from the drippings.
While everyone else is butchering, buttering, basting, and stressing, you'll be making tender turkey and rich gravy without all of the fuss. Sometimes, simple really is better.

I recently asked my college-aged daughter if she wanted to roast a turkey herself. She said, "Yes, someday when I have my own house."
I then asked if she would like to make a spatchcocked turkey, my personal favorite. She said, "No! That's like advanced butchery, and I'm not going to do that. I just want to make a traditional turkey and cook it all the way through without it being raw."
So here it is. A very simple procedure on how to cook a turkey and make gravy in 10 minutes (if you want gravy), without a lot of extra steps, handling, or added butchery.
You don't have to cook the turkey upside down, forget about two different oven temperatures, stuff the cavity, or add a stick of butter under the skin. However, I do recommend 3 key steps:
- Dry-brine the day before roasting.
- Use a leave-in meat thermometer and an instant-read thermometer to prevent overcooking.
- Make this homemade brown chicken stock ahead of time to use in your gravy.
Those who want to make turkey are almost certainly thinking about gravy, too. Try using a large, 15 to 17-inch cast-iron skillet as the roasting pan. Cast iron does what expensive roasting pans wish they could do. It simplifies gravy-making with its heavy bottom, distributing the heat evenly when you reduce the pan drippings over a burner.
Want to make gravy ahead of time? Try my recipe for turkey gravy without drippings, perfect with mashed potato casserole and stuffing casserole. Need more white meat? Roast a turkey breast a day ahead of your holiday feast.
Ready to make turkey day an easy day? Check out my turkey guide for tips and timelines to help you with Thanksgiving. Let's do this together.
Jump to:
Why This Recipe Is Different
- It includes how to make gravy. You don't need to use a gravy separator and wait for the fat to rise. Plus, the stubborn sticky parts of the pan are deglazed to make the gravy, making clean up so easy.
- Lower internal temperature. Prevent overcooking by removing the turkey from the oven at 160℉ rather than 165℉. Just like my turkey breast and chicken breast recipe, the internal temperature will go up 5-8℉ while resting.
- No butter. No basting. It's not necessary since your turkey will be juicy from dry-brining and monitoring the internal temperature as it cooks.
- Deep, brown skin. Rubbing oil on the skin before roasting creates an attractive skin when compared to one without oil.
Issues Roasting A Turkey With Pan Gravy
Dryness Issues: This occurs when the turkey is overcooked.
- The dry-brine helps by retaining moisture.
- A meat thermometer will let you know exactly when to remove the turkey from the oven.
Uneven Cooking: A whole turkey has an awkward, uneven shape, making the breast cook faster than the dark meat.
- Don't stuff the cavity with lemons, onions, or stuffing. If you stuff the cavity, the bottom and inside of the turkey take longer to cook, resulting in overcooked breast meat.
- Use a roasting rack so hot air can circulate around it, and point the legs towards the back of the oven.
- Make sure to insert the thermometer's probe in the right spot. I'll show you how in the steps below.
Bland and Pale Gravy: If you don't brown your turkey drippings over heat, you will have missed out on developing deep flavor by caramelizing the fond and a desirable dark amber color.
Ingredients
These are the ingredients needed to make easy roasted turkey and pan gravy!

- Whole, Defrosted Turkey: It can be natural or enhanced with salt. Check out my turkey guide for more tips.
- Canola Oil: To brown the skin. Any neutral oil will work, like vegetable, grapeseed, or avocado oil. I have noticed olive oil does not brown as much, but it still works.
- Diamond Crystal kosher salt and black pepper: If you are using Morton kosher salt, reduce the salt by half.
Turkey Gravy Ingredients
- Brown Chicken Stock: Save your chicken and turkey bones to make high-quality homemade brown chicken stock. It has a darker color and deeper flavor compared to white chicken stock from roasting the bones and vegetables.
- Unsalted butter: The fat from the roasted turkey is mixed with flour to make the roux, which thickens and flavors your stock when combined with flour. You will need to add butter if your pan drippings don't provide enough turkey fat.
- All-purpose flour: The second component of the roux. I use Gold Medal flour.
- White wine: Wine adds acidity to balance the rich gravy. Use a dry white wine that is drinkable. If it tastes bad, it will taint your gravy. I prefer a buttery California Chardonnay at a reasonable price. Here are some suggestions: Kendall Jackson, Hess Select, or Clos Du Bois. Avoid Sauvignon Blancs because they are too grapefruity, or Rieslings because they are too sweet.
- Season with Diamond Crystal kosher salt and pepper
See the recipe card below for ingredient measurements.
Variations & Substitutions
Here are some other ideas on adjustments you can make to roast turkey with pan gravy, or try my other side dishes to serve alongside.
- Herbs: Add chopped fresh herbs to the salt brine, like 1 tablespoon each of thyme and parsley, and 1 teaspoon of sage.
- Brown Chicken Stock: You can substitute homemade white chicken stock or find frozen homemade stock or broth at your local butcher or grocery store. A mass-produced carton of unsalted stock will work; however, the gravy won't be as good.
- Super smooth: Strain the gravy through a fine mesh strainer into a saucepan after it has thickened.
- Giblet gravy: While I prefer a smooth gravy, it's common to simmer the turkey neck and giblets (the heart and kidneys) in a small pan of water until soft. Shred the meat and add it to the finished gravy. You can also add this seasoned water to the stock.
- Gluten Free: Substitute an all-purpose gluten-free flour in the roux.
Equipment
- 13 x 18-inch rimmed baking sheet
- wire rack
- 17-inch cast iron skillet
- roasting rack, make sure it fits in your skillet
- leave-in probe meat thermometer
- instant-read meat thermometer, handy for quick temperature checks at the end
- boning knife or an 8-inch chef's knife, for carving
- 1 wire whisk. I prefer this flat-style whisk.
- 2 to 4-quart saucepan, to warm the stock
- hand-held fine mesh strainer to skim solids out of the skillet, or this fine mesh strainer if you want to filter the gravy into a saucepan
Step-by-Step Instructions
Dry Brine The Turkey (Day 1)

Step 1: Unwrap the defrosted turkey in the sink. Check the cavity and the flap of skin above the breast for the neck and feel for the heart, kidneys, and liver (gizzards). Remove the neck and packet of gizzards. If there is a pop-up turkey timer, remove it.
Save or freeze the turkey neck to make brown chicken stock.

Step 2:Place a wire rack over a 13 x 18-inch rimmed baking sheet. Place the turkey on top of the rack. Sprinkle kosher salt and black pepper evenly over the turkey and inside the cavity.
If the legs are not tied together, do so with butcher twine at the ankle.
Store in the refrigerator for 24 hours, uncovered.
Roast The Turkey (Day 2)
To make room for the turkey and thermometer, you may have to remove all oven racks except for one placed on the lowest level of the oven. Preheat the oven to 350℉.

Step 3: Pull the turkey out of the fridge and to the countertop. If salt remains crusted on the skin, brush it off with a paper towel. Brush or rub the cooking oil all over the turkey skin.
Place the roasting rack in the cast-iron skillet. Set the turkey on top of the rack.

Step 4: Insert your high-temperature thermometer probe in the thickest part of the breast. Make sure it will fit in your oven. The probe tip should not touch the bone. It should be ½ inch from the cavity.
Set the high temperature alert to 160℉.

Step 5: Roast the turkey with the legs facing the back of the oven. Every hour, check the bottom of the roasting pan to make sure it is not drying out. If so, prevent burnt drippings by adding 1 cup of water to the pan.
Cook by the internal temperature of the turkey, not by time alone. For planning purposes, it can take about 2½-3 hours for an 18-pound turkey (roughly 8-10 minutes per pound).

Step 6: After your thermometer alarms that the breast is at 160℉, verify the thickest part of the other side of the breast to make sure it is also at 160℉. Then, check the center area on the thickest part of both drumsticks to be at least 175℉. If less, rotate the pan so the lower temperature parts are facing the back of the oven. Keep roasting until all parts get to temperature.
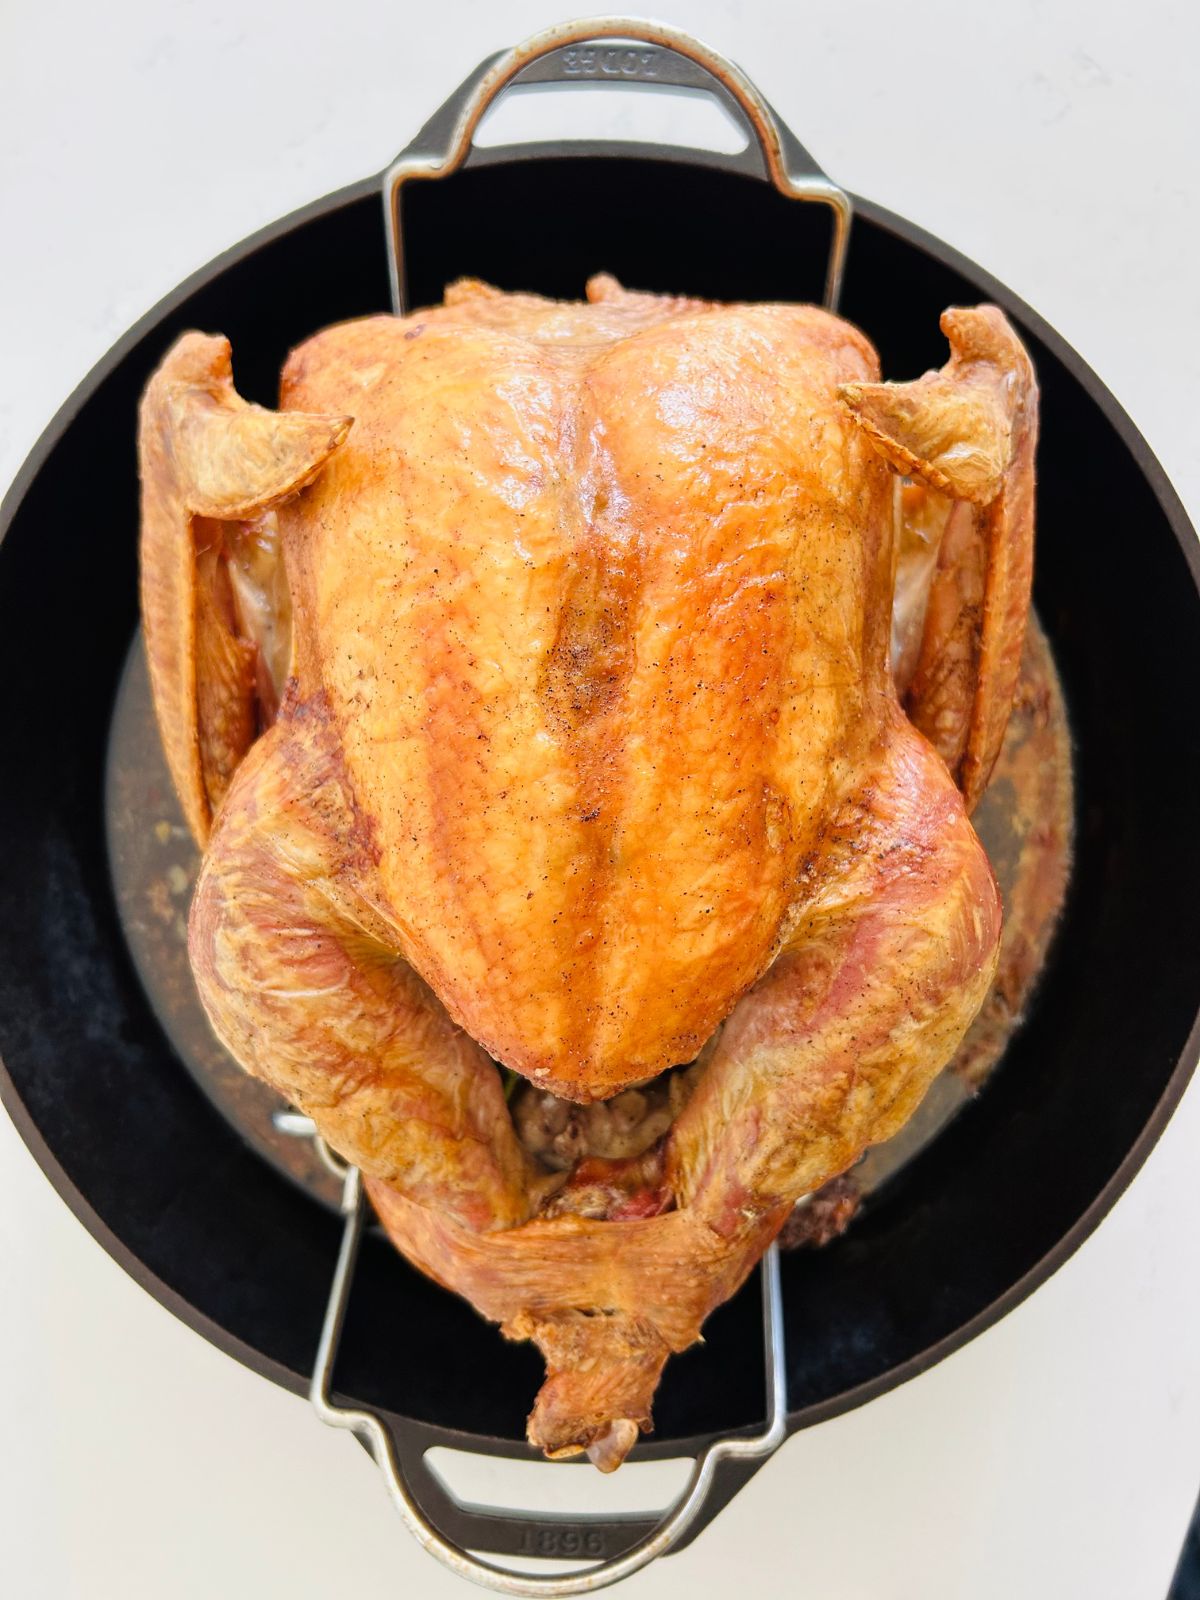
Step 7: Remove the turkey from the oven and let it rest for 15 minutes. Tip the turkey so the juices in the cavity drip down into the roasting pan for gravy.
Transfer the turkey to a cutting board or serving platter and let it rest another 15-45 minutes before carving. Here is a great tutorial from Serious Eats about carving a turkey.
Make Turkey Gravy From Pan Drippings
Time to make pan gravy: 10 minutes. While the turkey is resting, remove the rack from the roasting pan. Bring the chicken stock to a simmer in a pot.

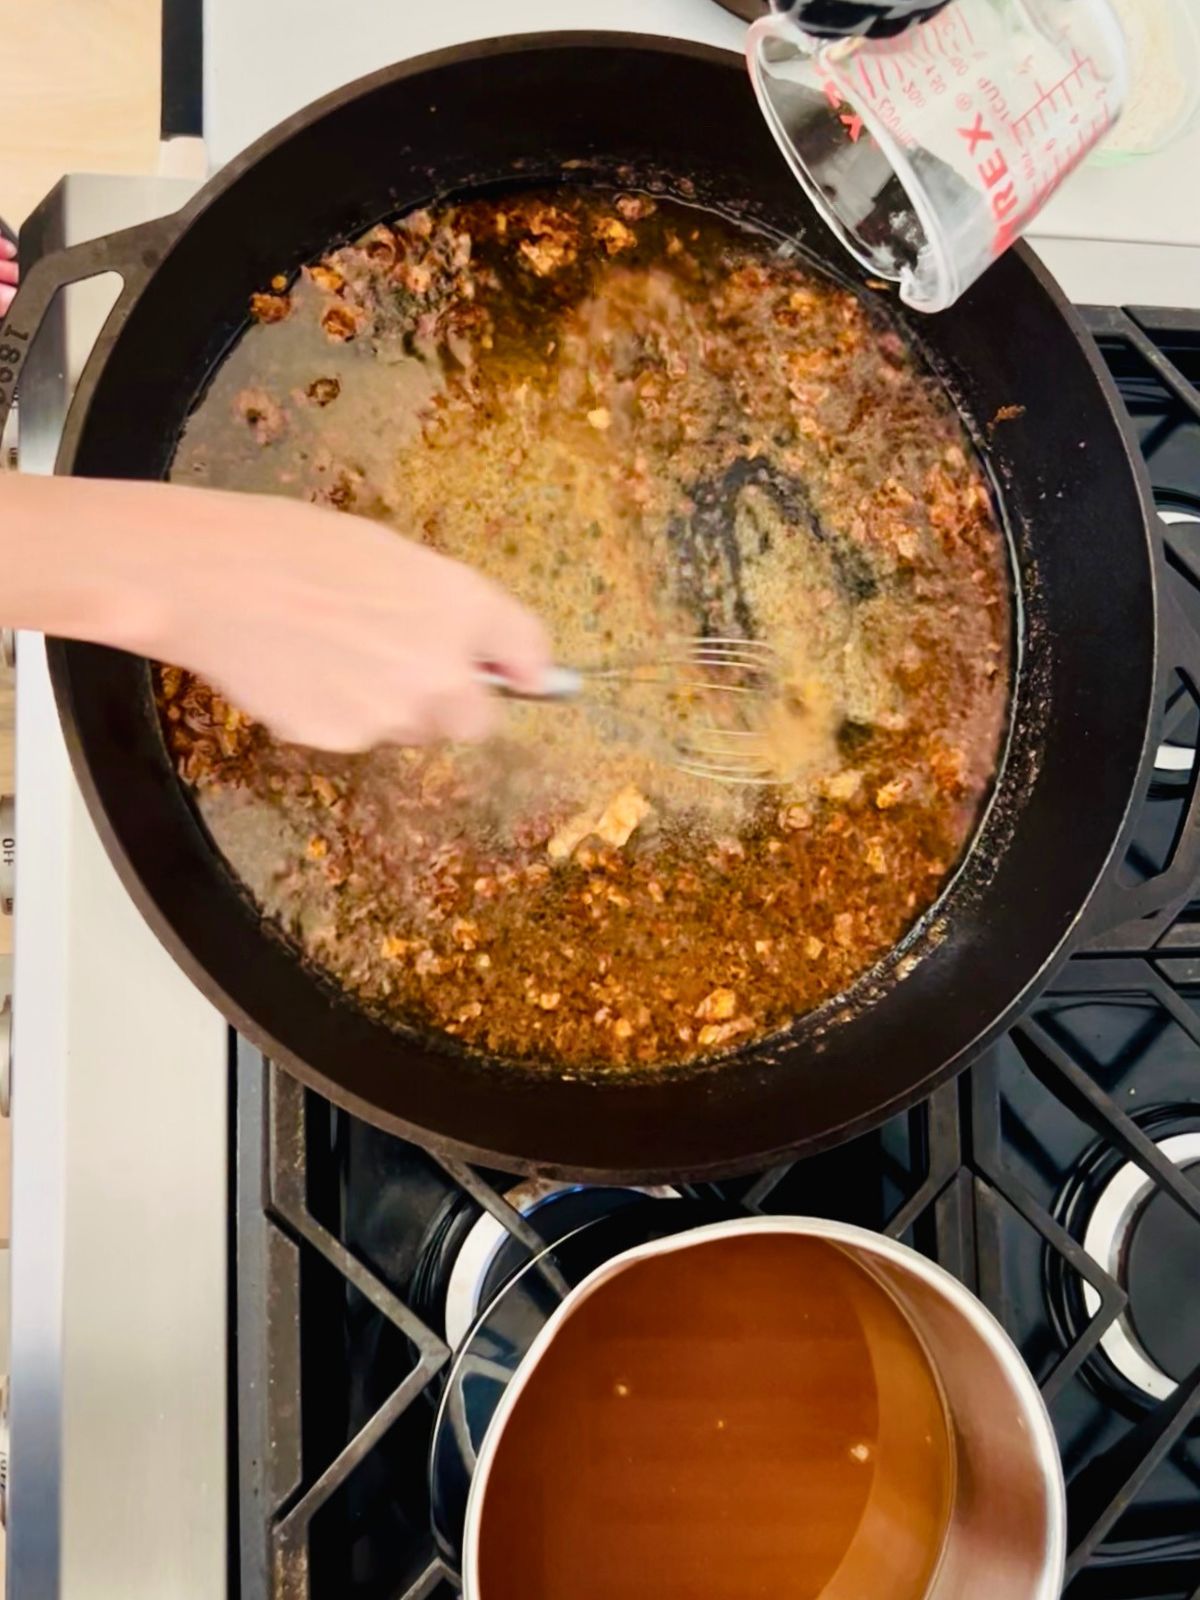
Step 8: To build flavor and create a deep amber color, brown the drippings by placing the cast-iron skillet on top of 1 or 2 burners set at medium-high heat. Use the whisk or a wooden spoon to loosen any pieces from the bottom of the pan. Reduce the liquid down so that all that you have remaining is the fat from the turkey drippings.

Step 9: Tilt the pan and observe how much turkey fat is remaining. There needs to be about 8 tablespoons. If not, add unsalted butter to reach 8 tablespoons and let it melt until it stops bubbling. You may not need butter.
Step 10: While whisking, drizzle the white wine into the pan. Continue whisking until it has evaporated.

Step 11: Turn the burner down to a medium setting. Sprinkle in ⅓ of the flour into the turkey drippings. Whisk until combined. Continue adding the flour in ⅓ increments while whisking until the flour is gone. Let it cook for 1-2 minutes.
Tip: If you still see fat after adding the flour, whisk 1 tablespoon of flour at a time into the skillet until all of the fat has been absorbed into the flour. This will prevent the fat from rising to the surface, creating a greasy texture.

Step 12: Whisk constantly while you ladle ½ cup of hot chicken stock at a time into the flour and turkey drippings.
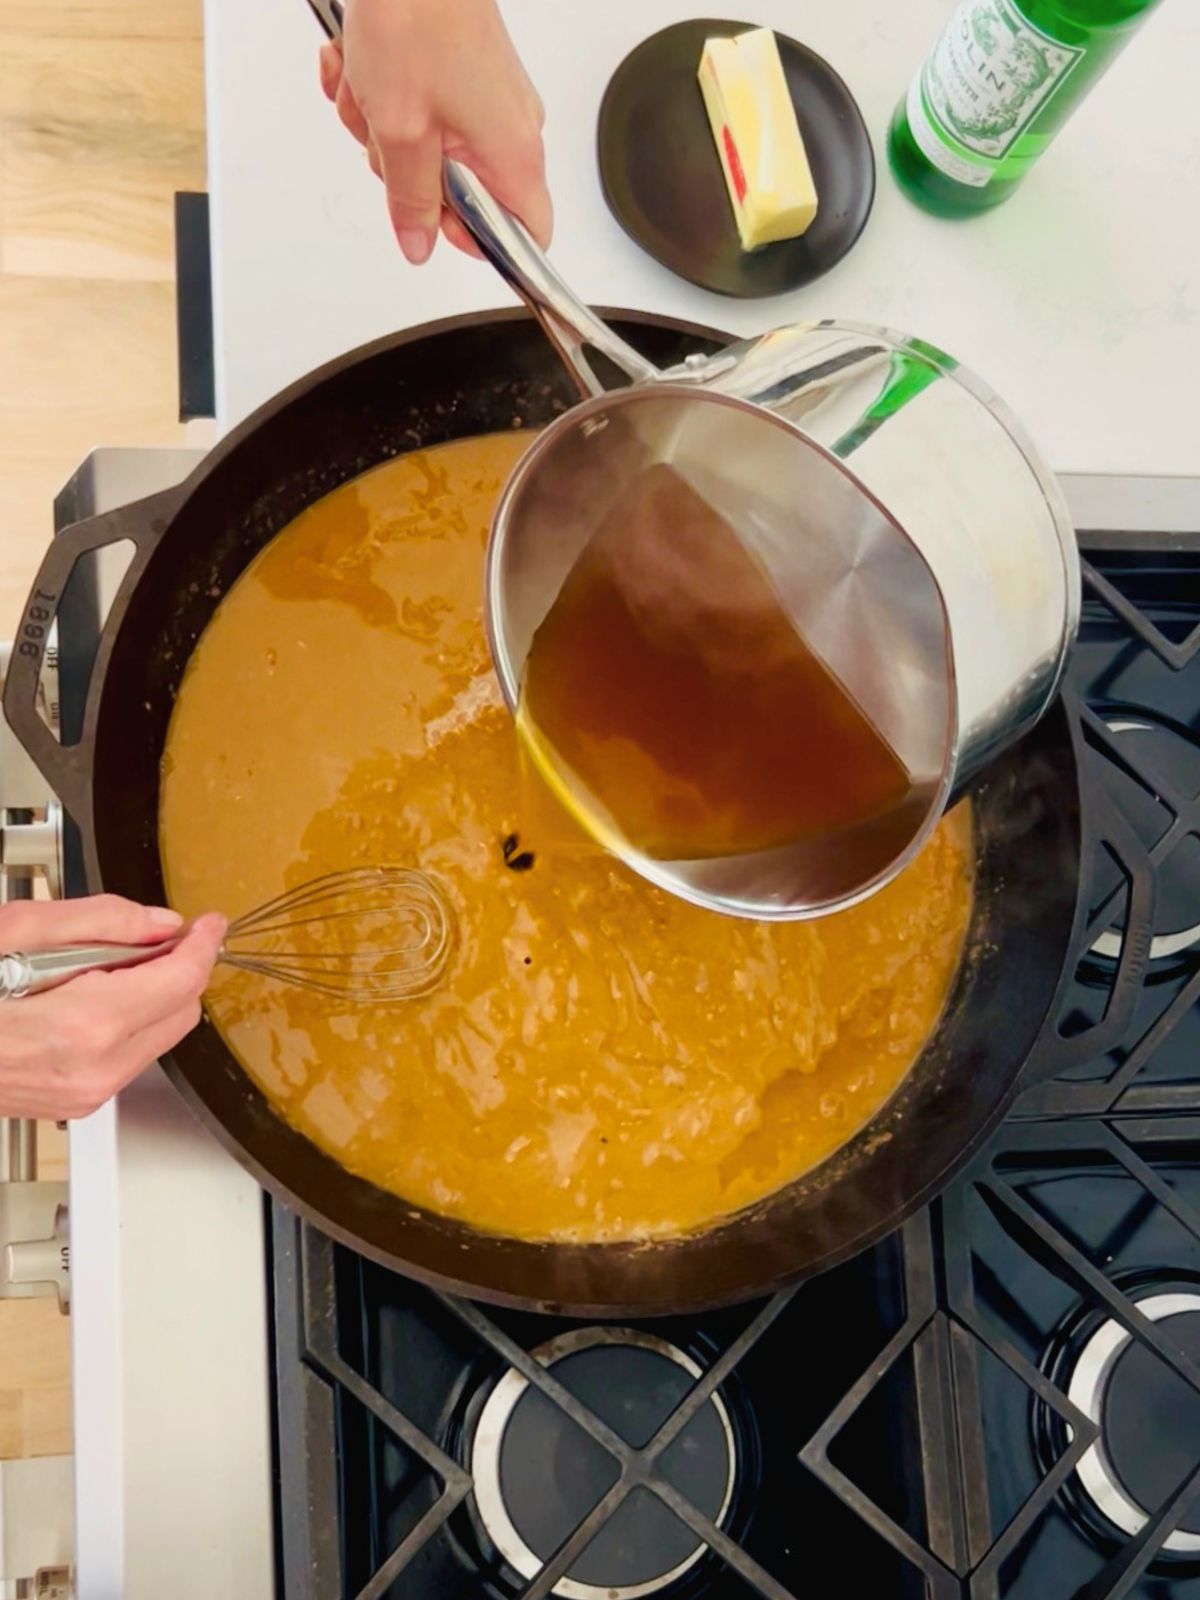
Step 13: Once the flour is well combined with about half of the stock, pour the remaining stock into the pan and whisk. Let the gravy simmer for 3-5 minutes to thicken.
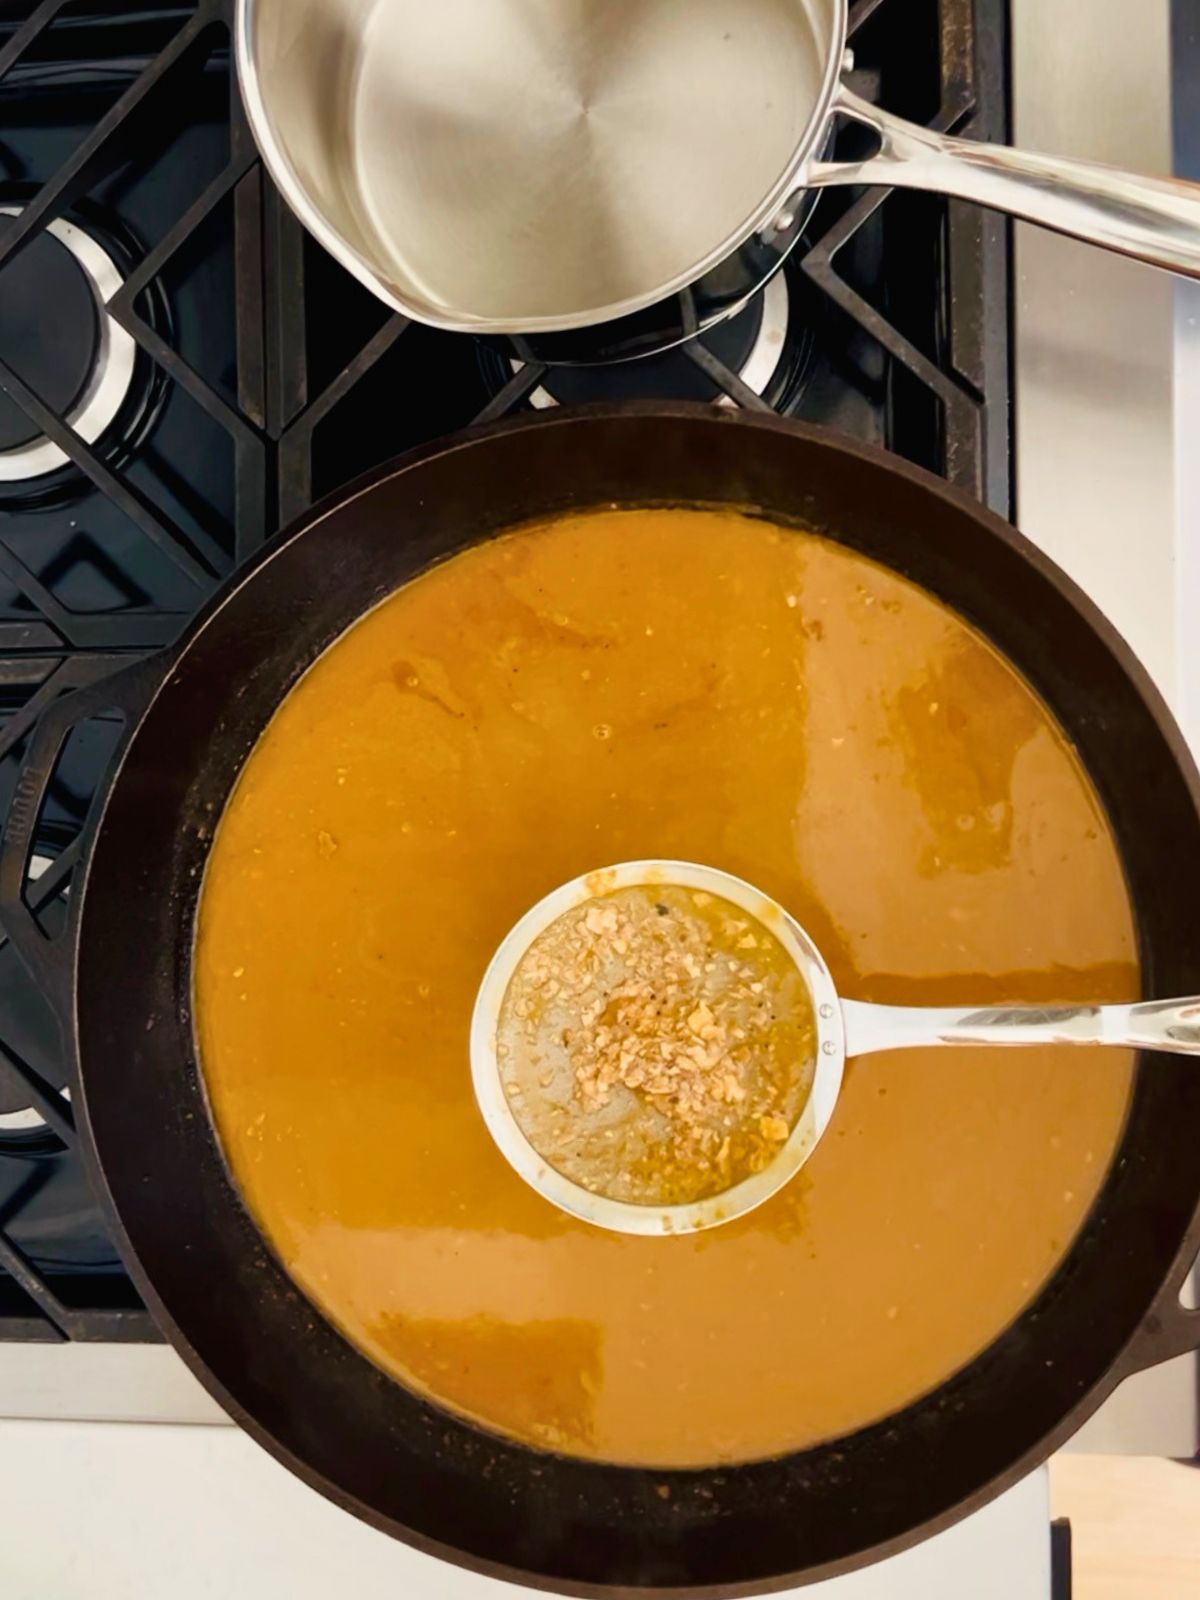
Step 14: Either strain the gravy into a saucepan or use a hand-held skimmer in the cast-iron skillet to remove the solids.

Step 15: Drizzle the heavy whipping cream into the gravy (optional) and whisk to combine. Taste to see if salt and pepper are needed. Keep warm until ready to serve.

Turkey Timing Made Simple
You can start roasting your turkey much earlier than most people think. Here is how to calculate your time so that your guests aren't waiting around hungry.
The 4-Step Timeline:
- 30 minutes: Preheat oven
- 8-10 minutes per pound: Roasting time (use the lower end!)
- 30-60 minutes: Resting (longer is better-it's still 160°F after an hour)
- 10 minutes: Carving time
Quick Example: 18½ -pound turkey for 6:00 PM dinner
- Total time needed: 4 hours 8 minutes
- Start preheating at 1:52 PM
Pro Tip: The turkey stays hot for a long time, giving you plenty of time to warm sides and make gravy!
Make Ahead And Reheating Instructions
Make Ahead: Rest for 30 minutes, remove the breasts, turkey quarters, and wings. Wait to slice the meat until just before serving. Let them come down to room temperature for 20-30 minutes before storing.
To Store: Turkey will hold in the refrigerator for up to 4 days in a covered dish or zip lock bag until the big meal. In addition, freeze in an airtight container for up to 3 months. Thaw in the refrigerator a full day before reheating it.
To Reheat: Arrange the turkey in an oven-proof dish covered tightly with foil. Reheat in the oven at 325℉ until warm, or about 20-25 minutes. Slice before serving.
FAQ
You can roast the turkey on a wire cooling rack rested on top of a 13 x 18-inch rimmed baking sheet. If you plan to make gravy from the drippings, pour the liquid into a 12-inch skillet. Then, use 1 cup of hot water and a wooden spoon to loosen the caramelized bits from the cookie sheet. Pour this into the same skillet. Proceed with the 'Make the Pan Gravy' section of the recipe card.
Yes. This recipe was tested using turkeys that were pre-brined because they are the most common option available.
If your turkey has not been pre-brined, I have found that it needs 50% more kosher salt. Increase the Diamond Crystal kosher salt to 3 tablespoons.
I plan to make 4 ounces per person. Not everyone wants gravy, which will leave you with a little bit for leftovers. If you want a large amount of gravy, you can double this recipe or make this make-ahead turkey gravy.
Yes! You can replace the white wine with dry white vermouth, which keeps forever in the cabinet, or don't add any wine. Chardonnay is my favorite option with the additional depth and acidity, but the gravy will still be delicious without it.
Make a beurre manie paste by mixing 2 tablespoons of room temperature unsalted butter and 2 tablespoons of all-purpose flour in a bowl. Whisk in 1 tablespoon of the beurre manie at a time to thicken your gravy, then let it simmer for a few minutes before serving.
More Recipes You Will Love
- Your Guide To Preparing A Turkey
- Turkey Gravy Recipe Without Drippings
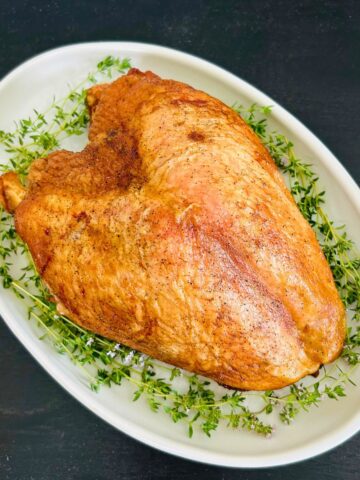
- Oven Roasted Turkey Breast With Dry Brine
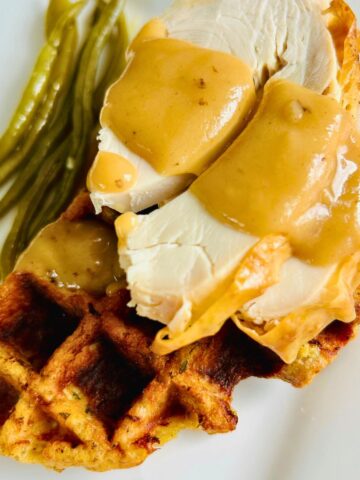
- Stuffing Waffles Recipe (Thanksgiving Leftovers)
- Mashed Potato Casserole With Cream Cheese
- Stuffing Recipe With Two Breads
- Brown Chicken Stock Recipe
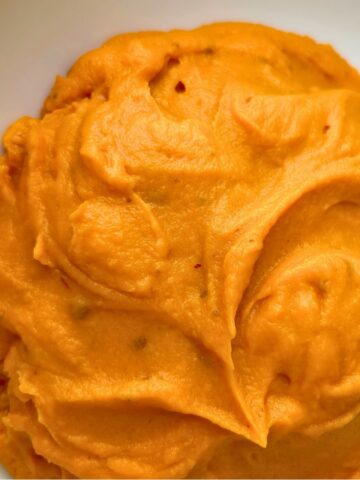
- Easy Chipotle Sweet Potato Puree
- Slow Cooker Green Beans Recipe


Did you try any of these tips? Leave a comment below to let us know how it turned out! Thanks for visiting!
📖 Recipe

Easy Roasted Turkey With Pan Gravy
Equipment
- 13 x 18-inch rimmed baking sheet
- wire rack
- 17 inch cast iron skillet
- roasting rack
- leave-in probe meat thermometer with an alarm
- instant-read thermometer (to double-check the internal temperatures)
- 8-inch chef's knife or boning knife (for carving)
- 2 to 4-quart pot (to warm the stock)
- wire whisk
- fine mesh strainer (to filter the gravy)
Ingredients
For The Turkey
- 18-19 pound whole turkey
- 2 tablespoons Diamond Crystal kosher salt
- 2 teaspoons freshly ground black pepper
- 2 tablespoons neutral oil (canola, vegetable, or grapeseed oil)
For The Pan Gravy
- 4 tablespoons unsalted butter (if needed, add enough butter so you have 8 tablespoons of fat in the pan)
- ½ cup all-purpose flour
- ¼ cup dry white wine
- 32 ounces homemade chicken stock (no salt)
- ¼ cup heavy whipping cream (optional)
- kosher salt and pepper, to taste
Instructions
Dry Brine The Turkey (Day 1)
- Unwrap the defrosted turkey in the sink. Remove the neck and packet of gizzards. If there is a pop-up turkey timer, remove it. Save or freeze the turkey neck to make brown chicken stock.
- Place a wire rack over a 13 x 18-inch rimmed baking sheet. Place the turkey on top of the rack. Sprinkle kosher salt and black pepper evenly over the turkey and inside the cavity. If the legs are not tied together, do so with butcher twine.
- Store in the refrigerator for 24 hours, uncovered.
Cook The Turkey (Day 2)
- To make room for the turkey and thermometer, you may have to remove all oven racks except for one placed on the lowest level of the oven. Preheat the oven to 350℉.
- Pull the turkey out of the fridge and to the countertop. If salt remains crusted on the skin, brush it off with a paper towel. Brush or rub the cooking oil on the turkey skin. Place the roasting rack in the cast-iron pan. Set the turkey on top of the rack.
- Insert your high-temperature thermometer probe in the thickest part of the breast. Make sure it will fit in your oven. The probe tip should not touch the bone. It should be ½ to 1-inch from the cavity. Set the high temperature alert to 160℉.
- Roast the turkey with the legs facing the back of the oven. Every hour, check the bottom of the roasting pan to make sure it is not drying out. If so, prevent burnt drippings by adding 1 cup of water to the pan.
- Cook to an internal temperature of 160℉ for the breast. Cook by the internal temperature of the turkey, not by time alone. For planning purposes, it can take about 2½-3 hours for an 18-pound turkey (roughly 8-10 minutes per pound).
- After your thermometer alarms that the breast is at 160℉, verify the thickest part of the other side of the breast to make sure it is also at 160℉. Then, check the center area on the inside of the thickest part of both drumsticks to be at least 175℉. If less, rotate the pan so the lower temperature parts are facing the back of the oven. Keep roasting until all parts get to temperature.
- Remove the turkey from the oven and let it rest for 15 minutes. Tip the turkey so the juices in the cavity drip down into the roasting pan for gravy.
- Transfer the turkey to a cutting board or serving platter and let it rest another 15-45 minutes before carving.
Make The Pan Gravy (10 Minutes)
- While the turkey is resting, remove the rack from the roasting pan. Bring the chicken stock to a simmer in a pot.
- To build flavor and create a deep amber color, place the cast-iron skillet on top of 1 or 2 burners set at medium-high heat. Use the whisk or a wooden spoon to loosen any pieces from the bottom of the pan. Reduce the liquid down so that all that you have remaining is the fat from the turkey drippings.
- Tilt the pan to observe how much turkey fat is remaining. There needs to be about 8 tablespoons. If not, add unsalted butter to get 8 tablespoons of fat and let it melt until it stops bubbling. You may not need butter.
- While whisking, drizzle the white wine into the pan. Continue whisking until it has evaporated.
- Turn the burner down to a medium setting. Sprinkle in ⅓ of the flour into the turkey drippings. Whisk until combined. Continue adding the flour in ⅓ increments while whisking until the flour is gone. Let it cook for 1-2 minutes.
- Tip: If you still see fat after adding the flour, whisk 1 tablespoon of flour at a time into the skillet until all of the fat has been absorbed into the flour.
- Whisk constantly while you ladle ½ cup of hot chicken stock at a time into the flour and turkey dripping. Once the flour is well combined with about half of the stock, pour the remaining stock into the pan and whisk. Let the gravy simmer for 3-5 minutes to thicken.
- Either strain the gravy into a saucepan or use a hand-held skimmer in the cast-iron skillet to remove the solids.
- Drizzle the heavy whipping cream into the gravy and whisk to combine (optional). Taste to see if salt and pepper are needed. Keep warm until ready to serve.
Notes
- If your turkey is frozen, defrost it on a tray in the fridge. Plan 24 hours of defrost time for every 4 pounds.
- If you buy a turkey that has not been injected with salt, increase the Diamond Crystal kosher salt for the dry brine by 50% or 3 tablespoons.
- 30 minutes: Preheat oven
- 8-10 minutes per pound: Roasting time (use the lower end!)
- 30-60 minutes: Resting (longer is better-it's still 160°F after an hour)
- 10 minutes: Carving time
- Total time needed: 4 hours 8 minutes
- Start preheating at 1:52 PM
Nutrition
The provided nutritional information is an estimate per serving. Accuracy is not guaranteed.

Comments
No Comments